
DIY Key Fob Shell Replacement: What Tools Do You Need?
Replacing your key fob shell at home is a simple and cost-effective solution to keep your key functional without spending a fortune at the dealership. With the right tools and a little patience, you can swap out your old or broken key fob shell in just a few minutes. For some key fob models, no special tools are needed—just the provided hex key and screws from Dubbs Hardware. Here’s everything you need to get started.
Essential Tools for Key Fob Shell Replacement
Before you begin, gather the following tools to ensure a smooth process:
1. Small Screwdriver (Phillips or Flathead)
Most key fob shells are held together with small screws. A precision Phillips or flathead screwdriver will help you safely remove and reattach them without damaging the shell.
2. Plastic Pry Tool or Guitar Pick
A plastic pry tool or a guitar pick is useful for carefully opening the key fob without scratching or cracking the case. Avoid using metal tools, as they can damage the internal components.
3. Tweezers
Tweezers help in handling small internal components, such as the circuit board, battery, and immobilizer chip, ensuring they are securely transferred to the new shell.
4. Adhesive or Double-Sided Tape (If Needed)
Some key fob shells require a small adhesive strip to keep the battery or internal parts secure. A tiny piece of double-sided tape can be useful in these cases.
5. Replacement Key Fob Shell
Ensure you have the correct replacement shell that matches your key fob’s design, button layout, and size. Compare the old shell with the new one before starting the replacement process.
6. Cutter
A small cutter can be handy for carefully removing any stubborn adhesive or trimming excess material during the replacement process.
7. Pliers
Pliers can be useful for holding or adjusting small components securely, especially when handling stubborn parts.
Step-by-Step Guide to Replacing Your Key Fob Shell
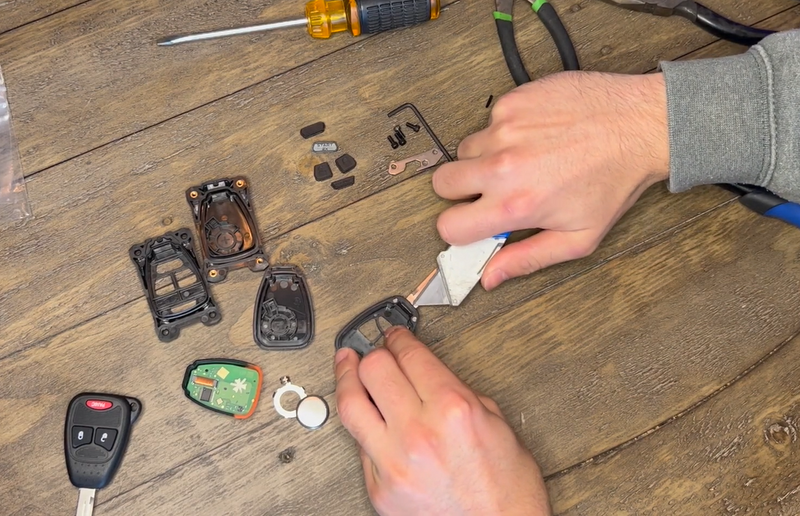
Step 1: Open the Old Key Fob Shell
- Use a small screwdriver to remove any screws securing the shell.
- If there are no screws, use a pry tool or guitar pick to gently separate the two halves of the shell.
Step 2: Transfer Internal Components
- Carefully remove the circuit board, battery, and any other internal parts.
- Important: If your key fob has an immobilizer chip, be sure to transfer it to the new shell, or your key may not work properly.
Step 3: Insert Components into the New Shell
- Place the circuit board and battery into the new shell, ensuring they are properly aligned.
- If your key fob has a built-in key blade, transfer it securely to the new shell.
Step 4: Secure the New Shell
- Snap the two halves of the new shell together or screw them in place.
- Double-check that all buttons function correctly before finalizing the assembly.
Step 5: Test Your Key Fob
- Test all buttons to ensure they are responsive.
- If your key has a physical blade, test it in the ignition to confirm it works properly.
Final Thoughts
Replacing your key fob shell at home is an easy DIY task that can save you money and extend the life of your key. By using the right tools and following these simple steps, you’ll have a fully functional key fob in no time. If you’re unsure about any step, refer to your vehicle’s manual or consult an expert for guidance.
For most models, Dubbs Hardware provides a video instruction on how to replace the key fob shell, making the process even easier. Check out our website for detailed guides and video tutorials.
Now that you have everything you need, grab your tools and give your key fob a brand-new look!


